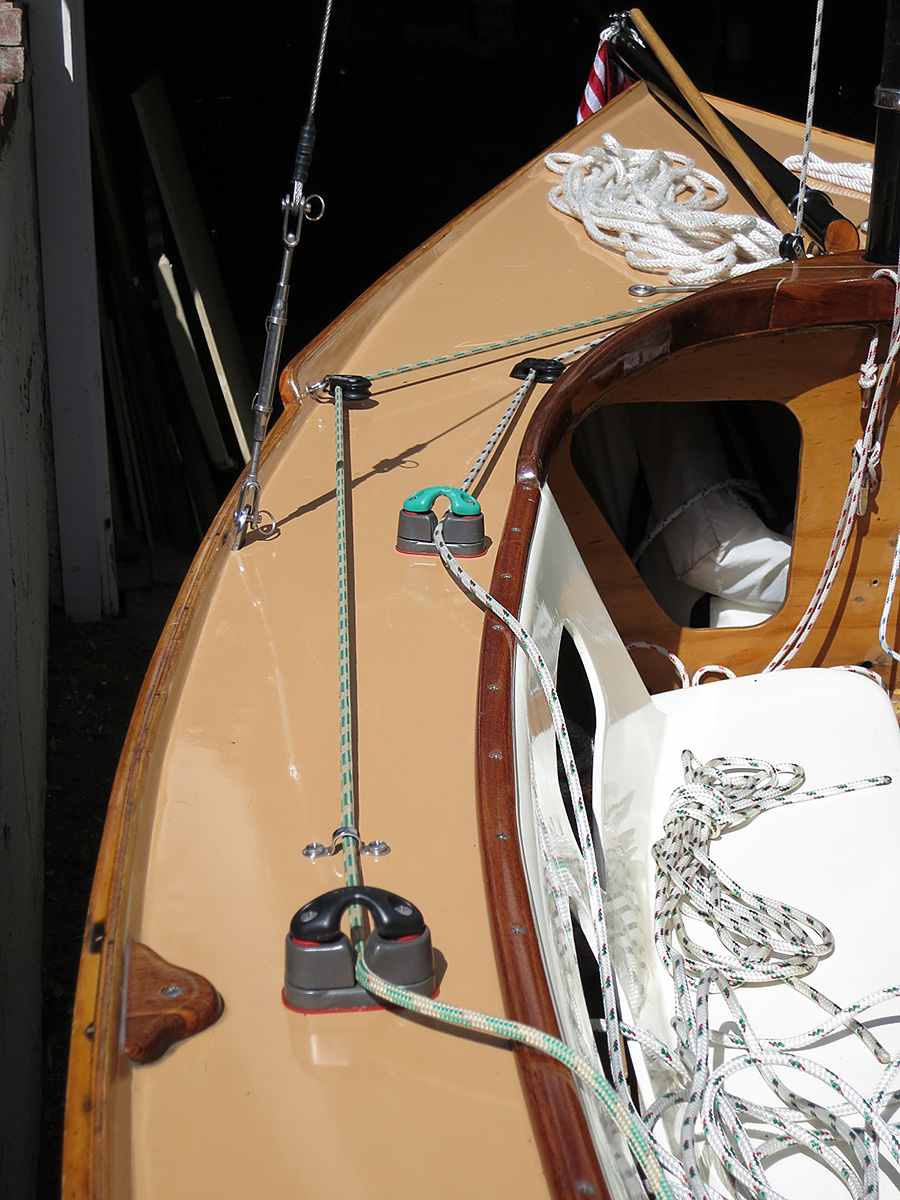
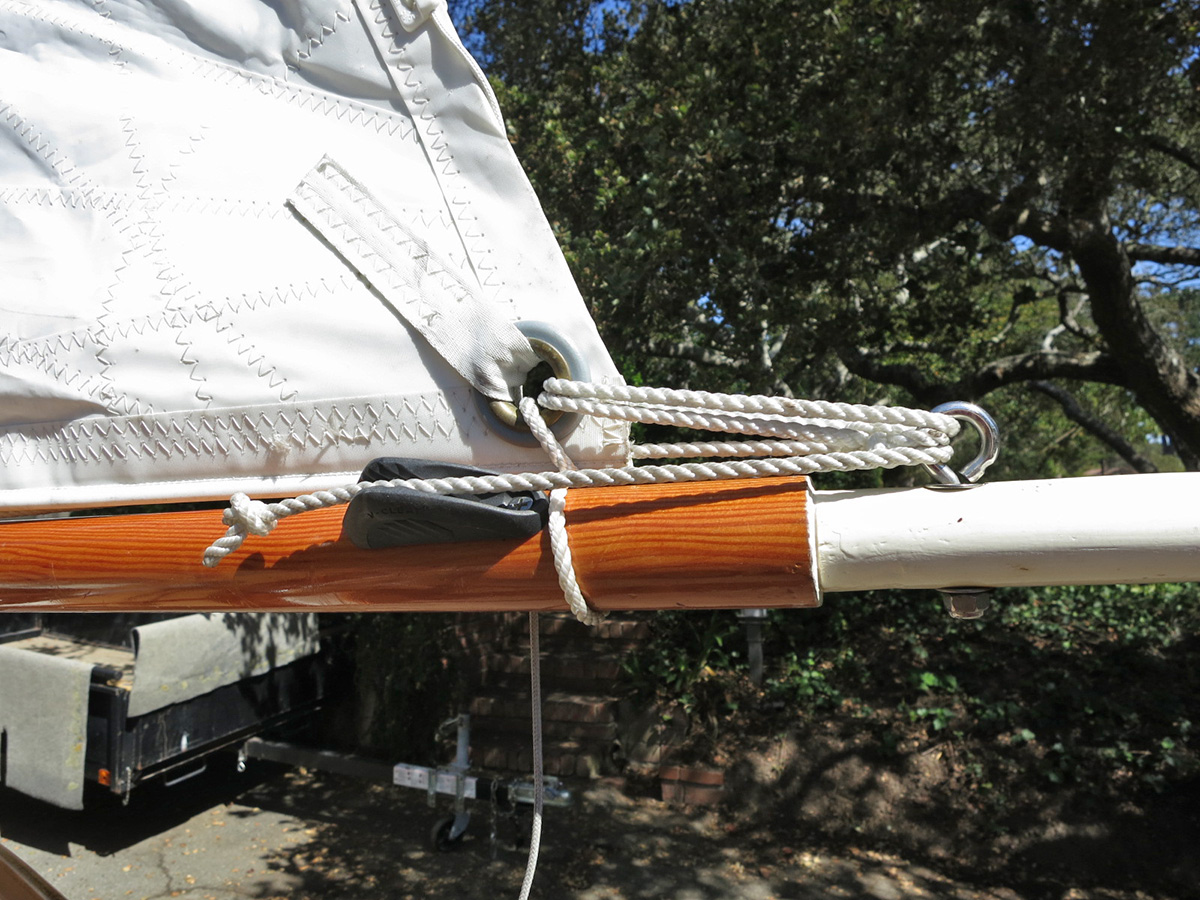
In this photograph, the Peak Halyard lead along the inside of the port deck is easy to see, and the Jib Sheet. Also note how the Mainsail is lashed to the Boom. The Gaff is done in much the same way. I saw a nice shot of a criss-cross method of lashing which I may try soon. It seemed to allow a little better sail shape, but it didn't look quite as minimal and clean as this method.
Click on any of these photos to enlarge for better details.
Looking forward along the Port Deck, one can see how the Jib Sheet (on the left) and the Peak Halyard are arranged. The curve of the deck made it hard to engage the cam cleat when the sheet was under load, so a small fairlead was placed ahead of the camcleats to help lead the sheet down into the cams.
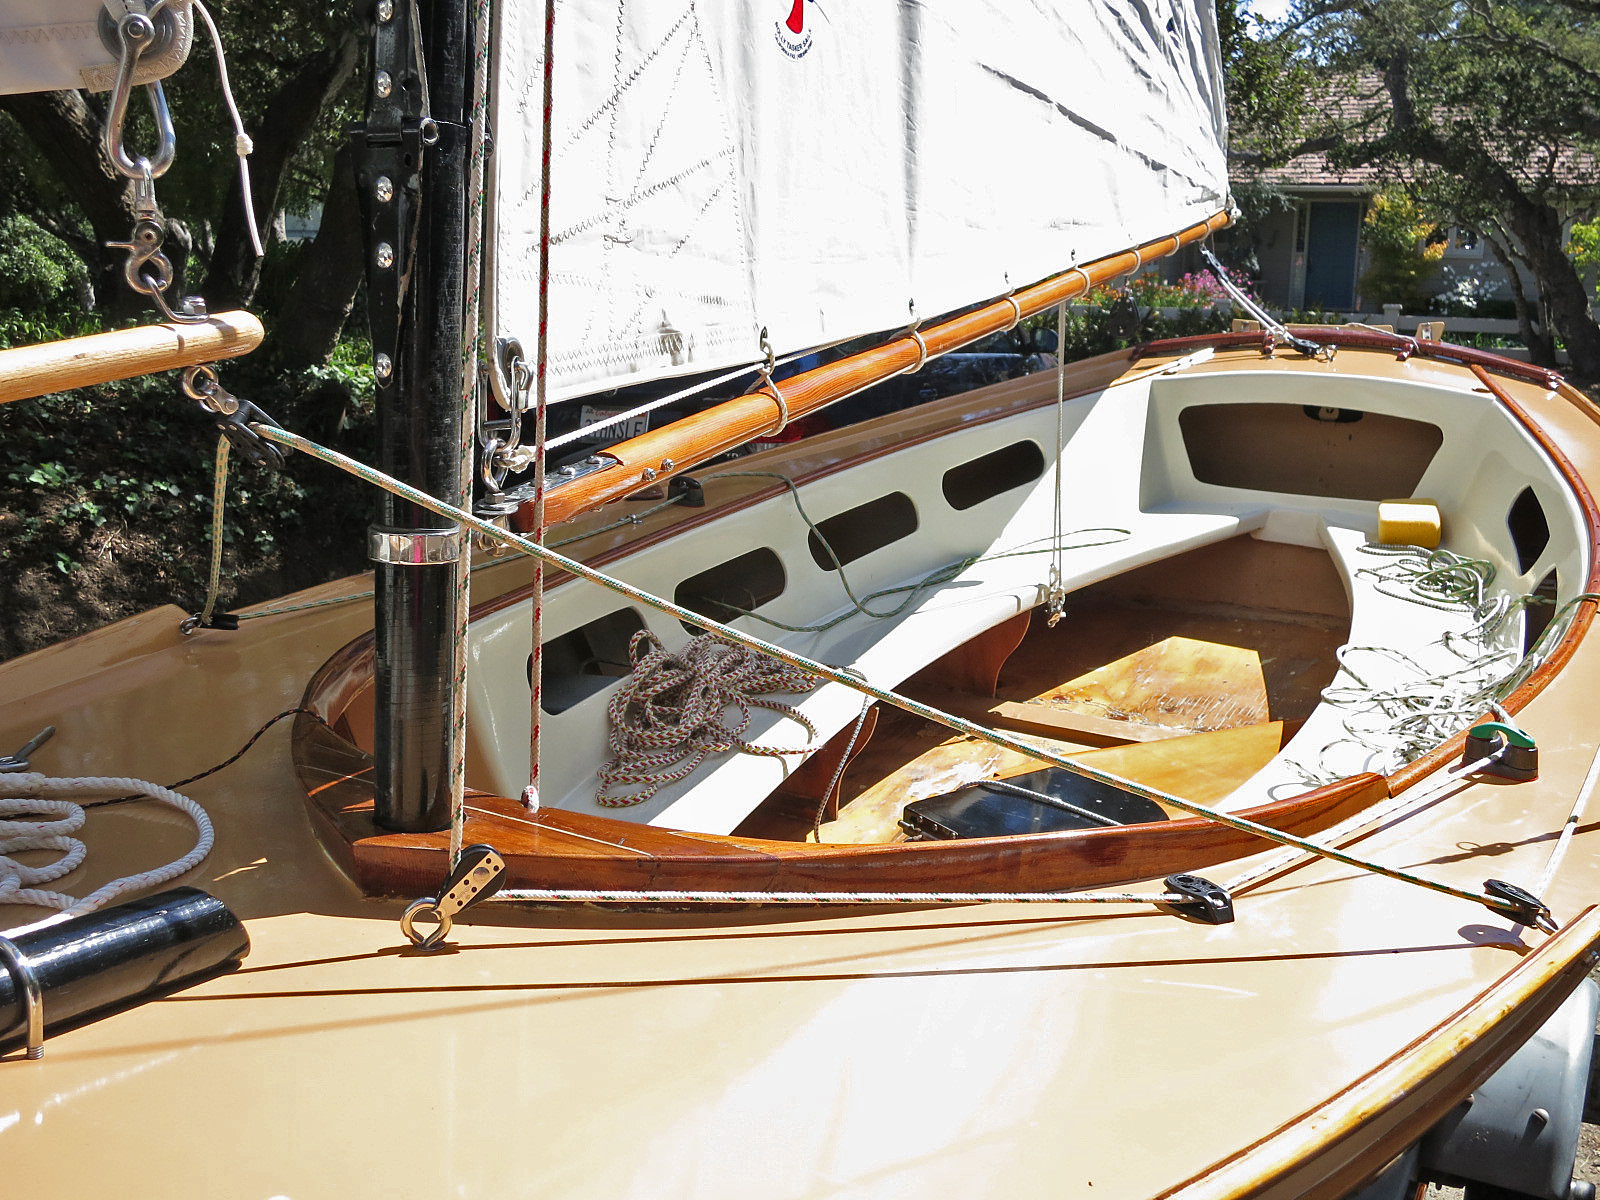
This Gooseneck is slightly different from the one shown in the plans. I wanted to use a piece of 1 1/2" full-round Fir for the Boom. This Gooseneck was made from stainless strap, bent, drilled, and polished — A bit of work, but I wanted a shinier look than alumnium. The Bowsprit hardware was made the same way.
The Boom part of the Gooseneck
is made from polished 1/8" stainless straps which fit just above and below a U-shaped piece of 1/8" stainless strap.The 5/16" eyebolt goes between the Boom straps and there's a washer above and below the U-shaped piece. I slid a piece of 5/16" fuel-line hose over the eyebolt as a pivot buffer/spacer (this sits in the U-shaped piece). The U-shaped strap piece is attached to the Mast Gooseneck Strap with a piece of threaded rod. A nut on either side of the Mast Strap clamps this securely to the mast, then a Nylock nut is run on the threaded rod on the outer sides of the U-shaped pice (with washers as needed to minimise slop and allow everything to move freely.)
The Mainsail Tack is attached to the Gooseneck with a captive shackle. This way a reef can be made in the Mainsail very easily.

At the aft end of the Boom, the lashing line was used for the outhaul of the Mainsail clew. The jam cleat is used more to slack off tension when the boat is stored than to be adjusted in use. (Although this is certainly possible.)
When taking a reef in the Mainsail, a line is tied to the Leech Cringle (the clew which is up where the reef is...) and this line is led through this eyebolt and to the jam cleat. It is then led forward along the Boom and used to lash the Leech Cringle to the Boom. This way one line is used for both outhaul and vertical tension along the leech. (This is one of those descriptions which makes more sense when you're working with the objects!)
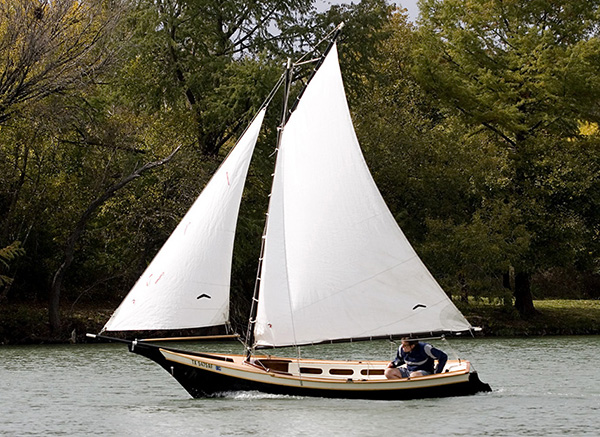
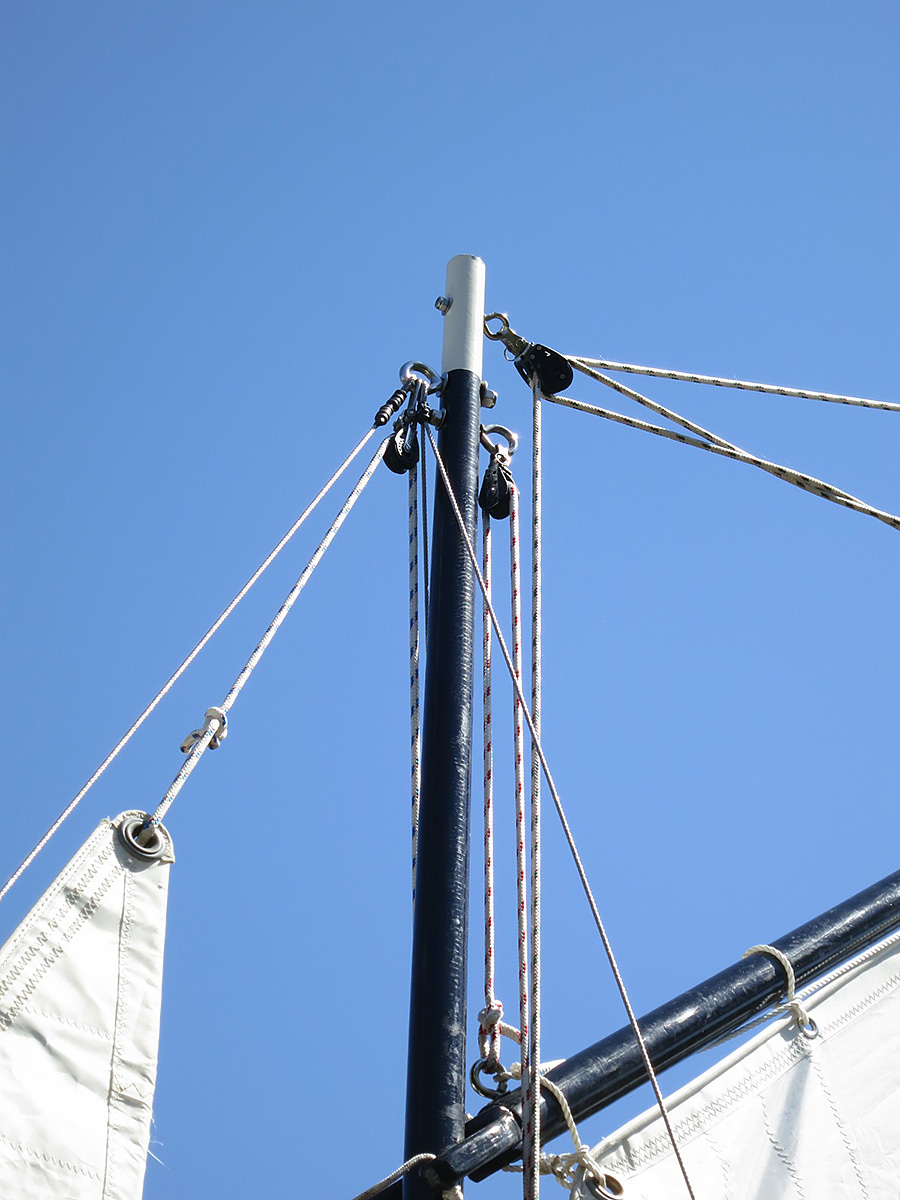
The Masthead Rigging is pretty much exactly like a Weekender (it is the same rig!) This photo is pretty self-explanatory...
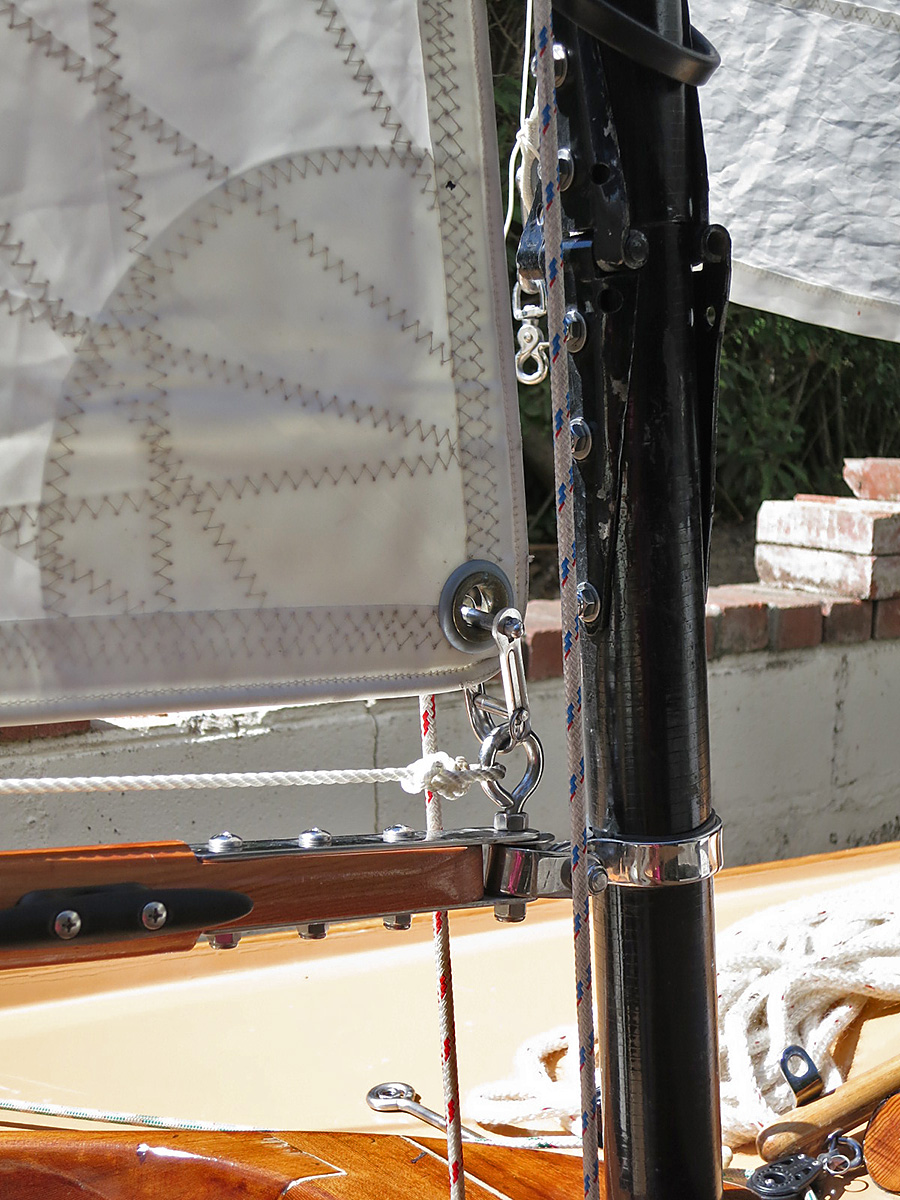
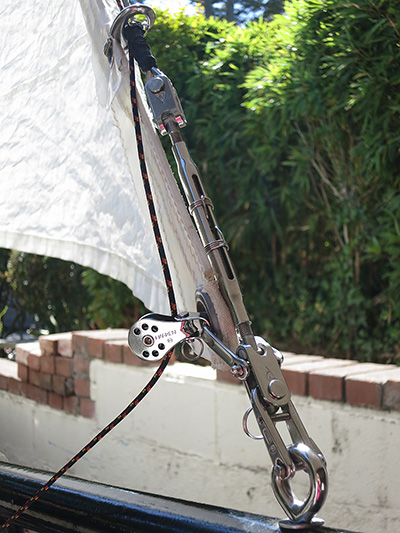
This Forestay detail shows how a captive shackle is used to make raising the Mast a very quick procedure. Once this shackle is locked, the temporary eyebolt holding the mast a the Tabernacle is removed so the Mast Hoops will raise and lower freely.
The small black-and-orange line (1/8" Spyderline) is the Jib Downhaul. It really helps pull the Jib down all the way, as it can kite up in windy conditions (kind of like when one has shortened sail in a blow, and doesn't want the Jib suddenly filling again!)
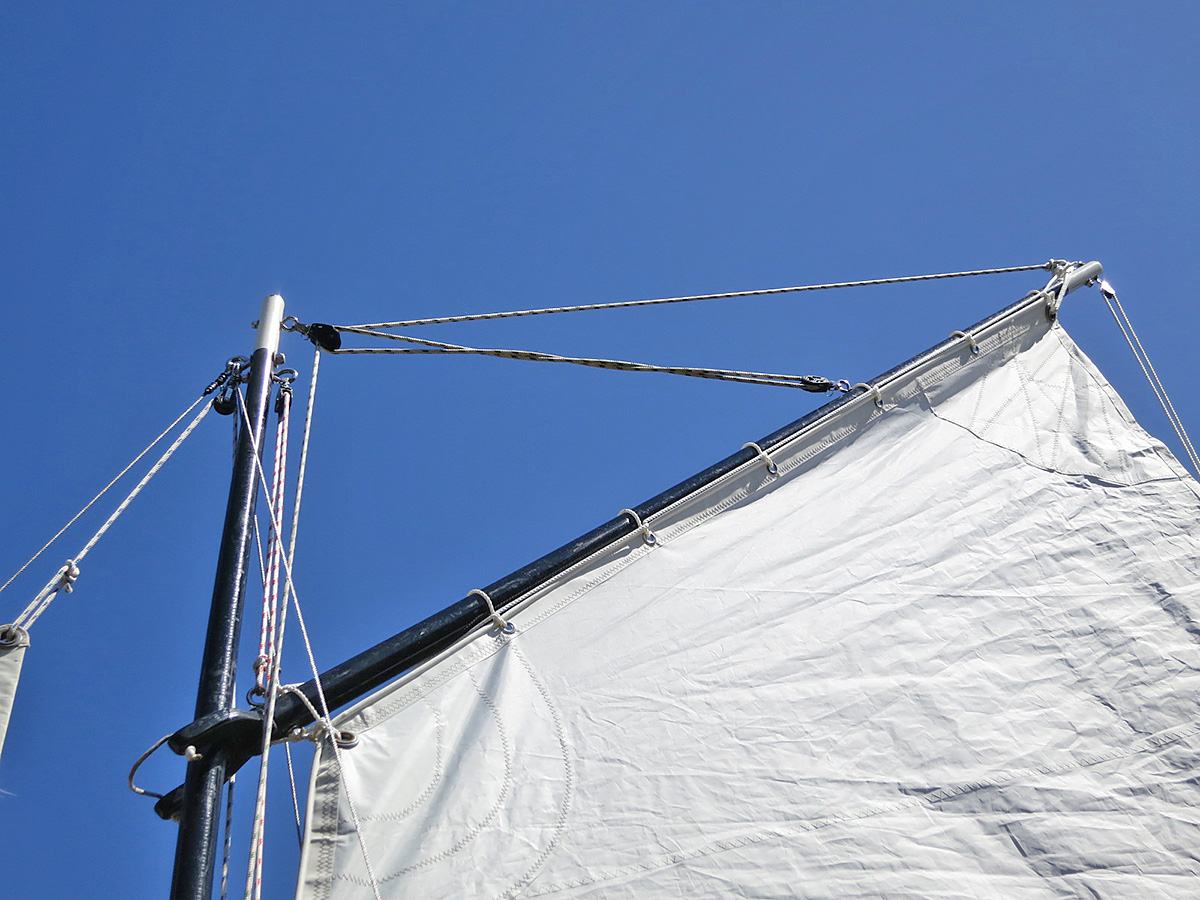
This look at the Masthead and Gaff shows a lot of different details. One thing I may fix: the forward block on the Gaff for the Peak Halyard appears to be a swivel block and the Peak Halyard is all twisted. I don't know if this is a frequent occurence, as I've never noticed any problems lowering or raising the Gaff Peak. I may replace this block with a simple one captive in the eyebolt. That should eliminate the twist. The small block and halyard at the very tip of the Gaff is the Flag Halyard (that's where the ensign is supposed to fly on a gaff-rigged sailboat!)


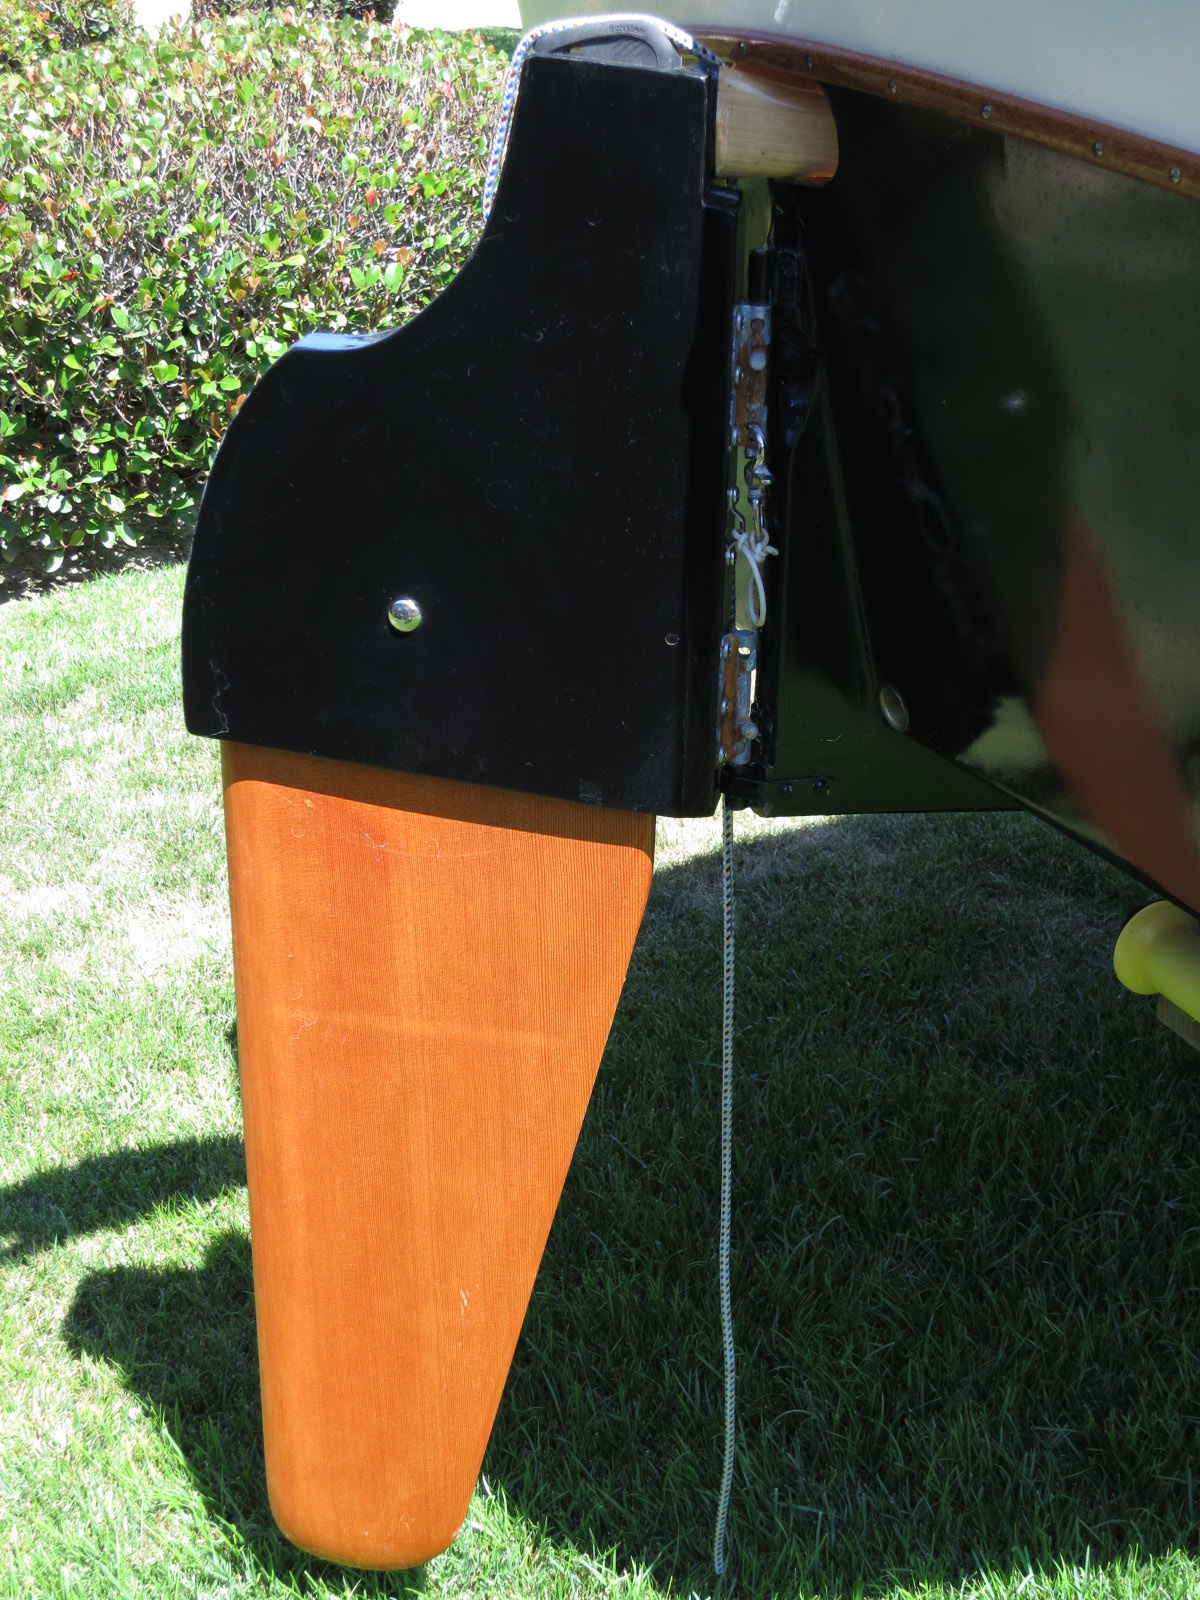
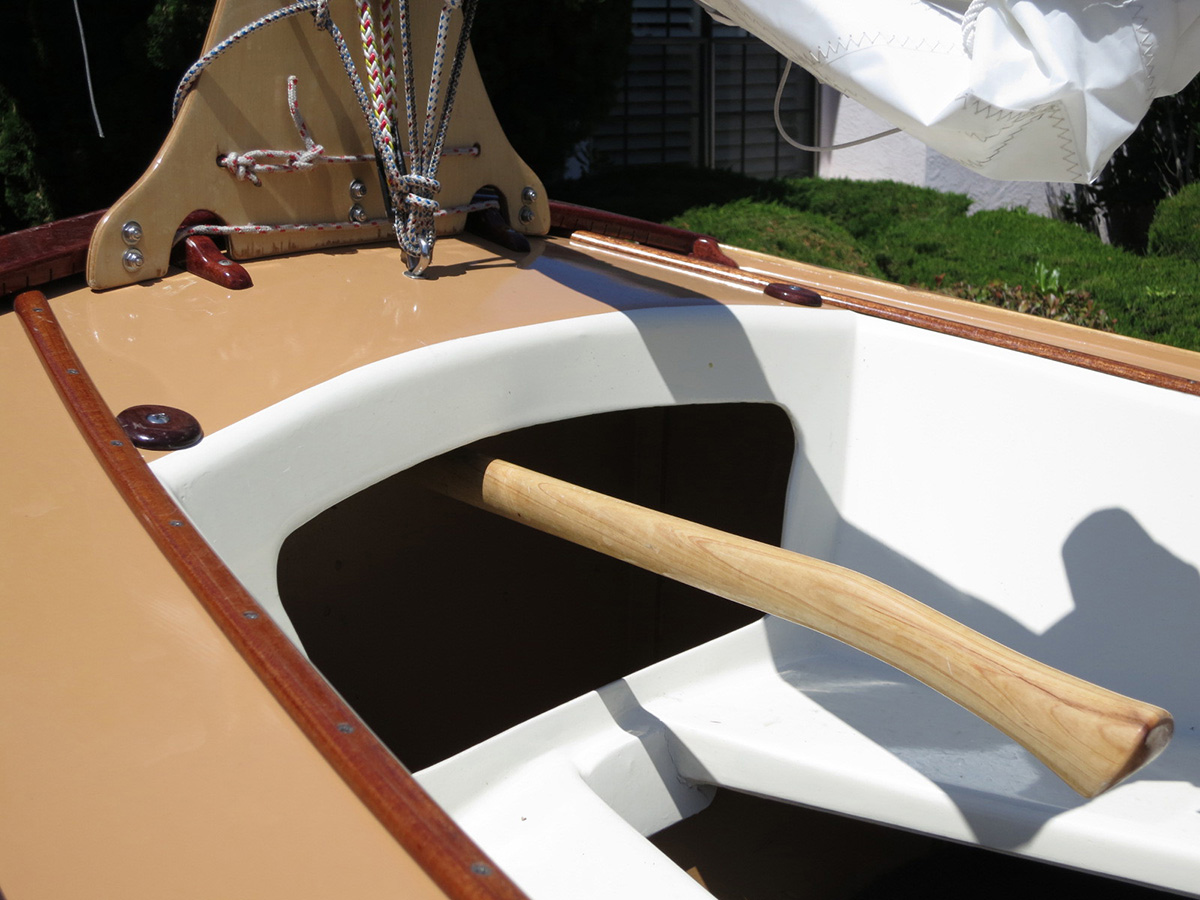
Personally, I think the Tiller shown in the plans is too short for my tastes. I decided to use an Axe Handle, just like our original Skipjack did back in the '70's! The Rudder Box is the same as in the plans, as is the Rudder. I used a nice Axe Handle and bedded it in the Rudder Box with thickened epoxy (and a few screws in through the Rudder Box Sides to help hold it in place.)
One can also see the snap I use to hold the Upper Barrel Bolt in place while the Rudder Box is on the Transom. The blue-and-white line is the Rudder Downhaul line. Notice the jam cleat on the top of the Rudder Box. The line is a bit long, as I can loop it under the rudder when the rudder is raised, then jam it back in the jam cleat and hold the rudder off the ground when launching.
Below, one can see the Axe Handle more clearly. It makes a nice-feeling, strong Tiller. One can also see part of the modified Taff Rail.